Add users
Video: Set up user accounts
Security - View, Add and Edit Users
The person in your firm responsible for setting up and maintaining user accounts can log in to CCH iFirm as the admin user or general user to manually add other user accounts.
We recommend you add all of your users, then send the login details in bulk. This will save you time and ensures all your users can begin to use CCH iFirm at the same time.
- You may see some fields that do NOT apply to your firm when you add a user, just ignore them.
- If you want to ensure that certain user information remains confidential, leave the sensitive fields blank.
- Once you have added a Partner/Admin user it is not possible to change their username, password, or security role.
- Click Admin Home > Security > User Manager - if using your Admin login, OR click Settings > Security > User Manager - if using your User login.
- Click Add User.
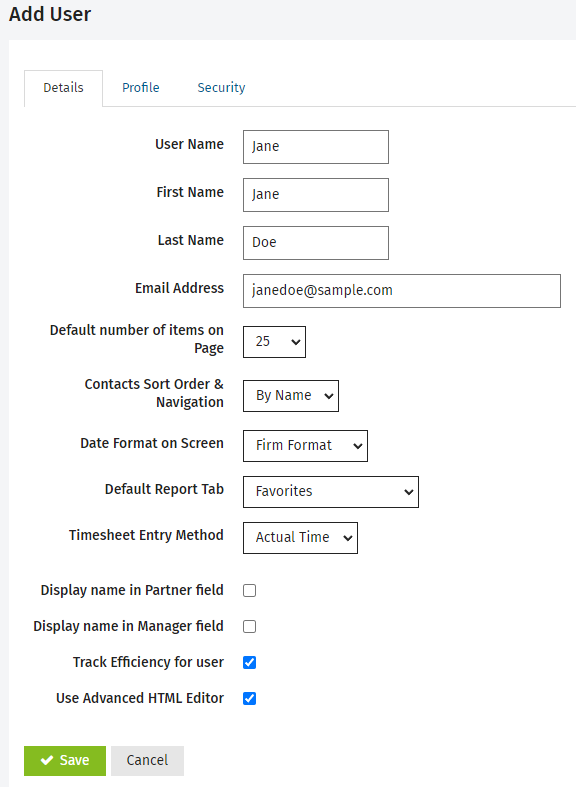
- Enter the mandatory details about the user: User Name (ensure you do NOT include an apostrophe), the user's First Name and Last Name, and the user's Email Address.
- Make selections as necessary:
- Select the Default number of items on Page - set how many items 10, 25 (default), 50, 100, 200 you want displayed on a page before the user has to navigate to the next page.
- Select the Contacts Sort Order & Navigation - set the preferred sort order, either Name (default) or Code, for the grids and the navigation links (Start, Previous, Next and End) in the Contacts module.
- Select the Date Format on Screen - set the preferred date format to be displayed on screen. The Firm Format is the format selected in the Firm Details in the Settings.
- Select the Default Report Tab - set the report tab that displays by default when users click Reports > All Reports. Setting the report section that is most relevant to the user enables them to get to those reports more quickly.
- Set the Timesheet Entry Method - Select Actual Time or Units. Click here for more information.
- Select Display name in Partner field - if you want the user to display as a partner in a contact's profile.
- Select Display name in Manager field - if you want the user to display as a manager in a contact's profile.
- Select Track Efficiency for user - if you want the user to be included in efficiency reporting.
- Select Use Advanced HTML Editor - if you want the user to have the full content editor toolbar when adding or editing content on the dashboard screen.
- Click the Profile tab to add more details, if necessary.
- Use the Calendar button
 to select the day the user started work at your firm.
 - Type the user's work, home, and mobile phone numbers.
- Use the Calendar button to select the user's birthday.
Users can enter details about themselves by clicking their user name in the top menu.
- Click the Security tab and apply the relevant security roles.
- We recommend you assign the Contacts - View Only security role to all users, so that they can access the Contacts module and view your contact records.
- You may want to delegate the tasks of setting up the Contacts module, adding contact records or setting up users to another staff member. In this case, you will need to apply the applicable security roles to that user's account. For example, Settings - Contacts.
- More security roles will become available once your module(s) is activated. You can come back and edit user accounts at any time.
- Click Save.
- Repeat the above steps to add user accounts for all staff members who will be using CCH iFirm.
- Send the logins in bulk when you have finished adding all users.
- Alternatively, you can click Send Login Details at the top of the Edit User page to notify that individual user of the new account.
See Also:
Choose a timesheet entry method